How to use Send push notification action
This action allows you to trigger displaying a web push notification on your website. When you build your workflow, you can define what condition needs to be met for your notification to be shown.
Use this action to show more personalized or goal-oriented notifications to your site visitors, instead of just one general notification.
For example, you can create a different notification for those who opened a particular message from you. Alternatively, you can show notifications only to contacts subscribed to a particular list.
Before your notification can be displayed, each visitor needs to allow the page to show push notifications when their browser will ask for permission.
Before you begin:
To use this automation element, you first need to:
- Create and configure at least one web push site.
- Add at least one notification to that site via Web push notifications. You can find a guide for creating your notification here: How to create a Web push notification?
How to add the action to your workflow?
You can’t use the “Send push notification” action as the first element of the workflow.
The element has only one exit point, no matter if a contact going through workflow has or hasn’t seen the notification.
To add the “Send push notification” action to your workflow, you need to drag-and-drop this element to your workspace and connect it to at least one element.

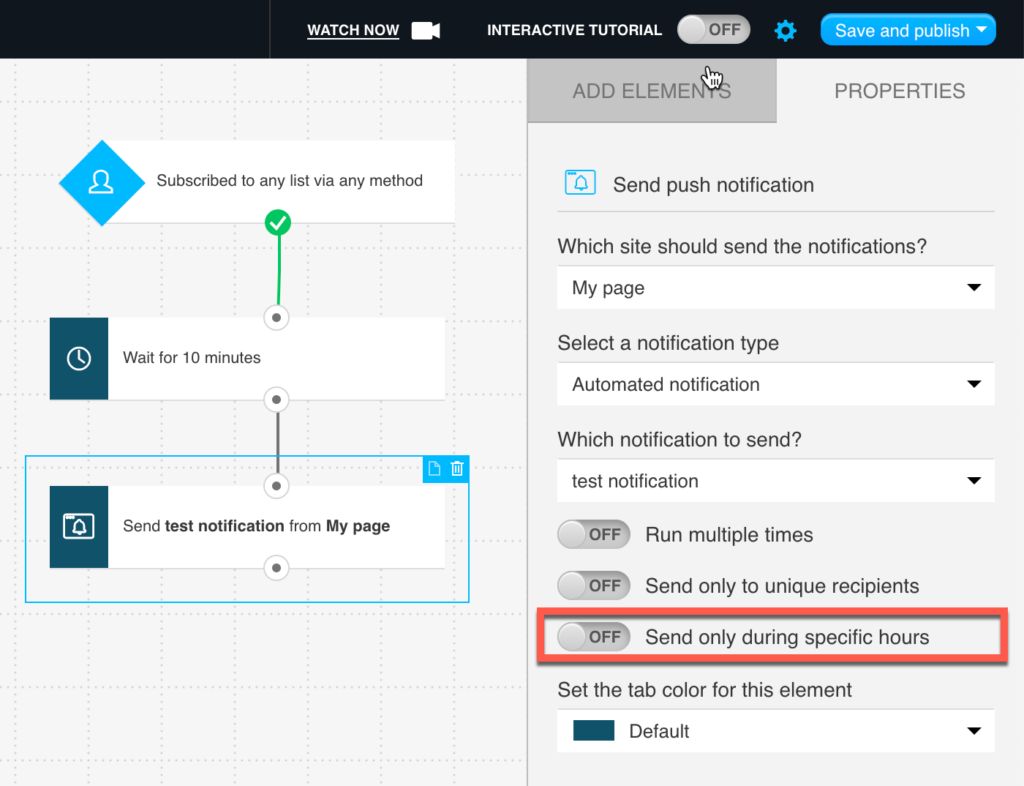
How to configure the properties
There are 3 main required settings you need to configure in the action details:
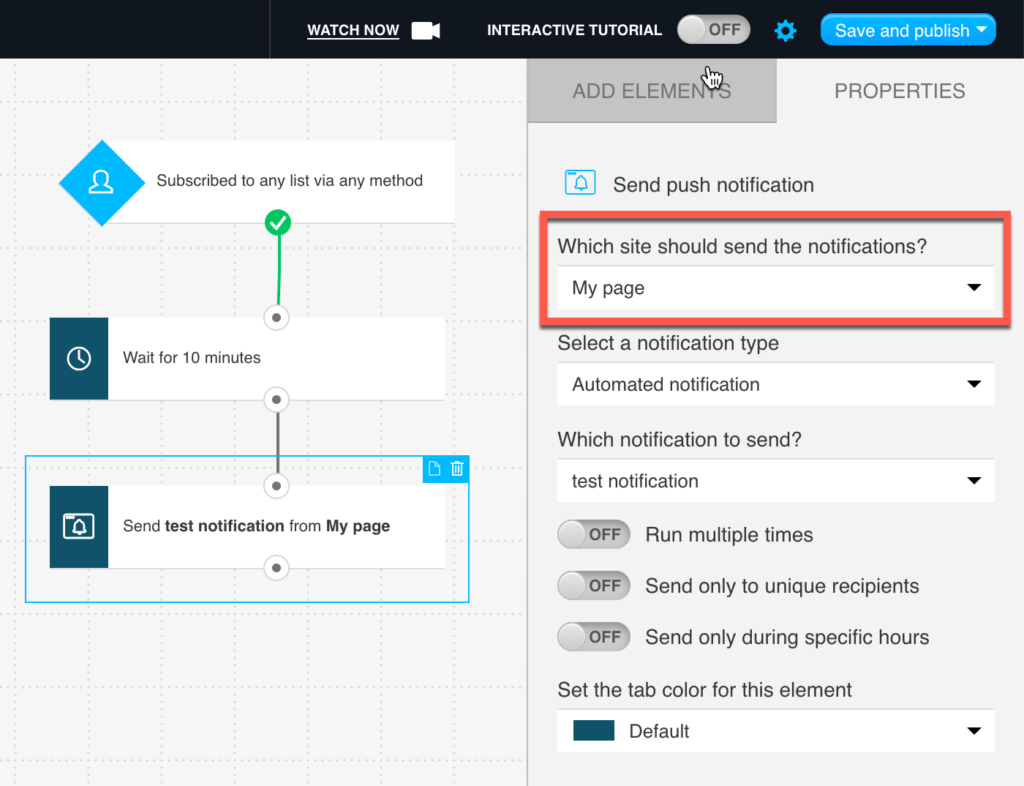
- “Which site should send the notification.”
You need to select a site created in Web push notifications that your notification will be shown on.
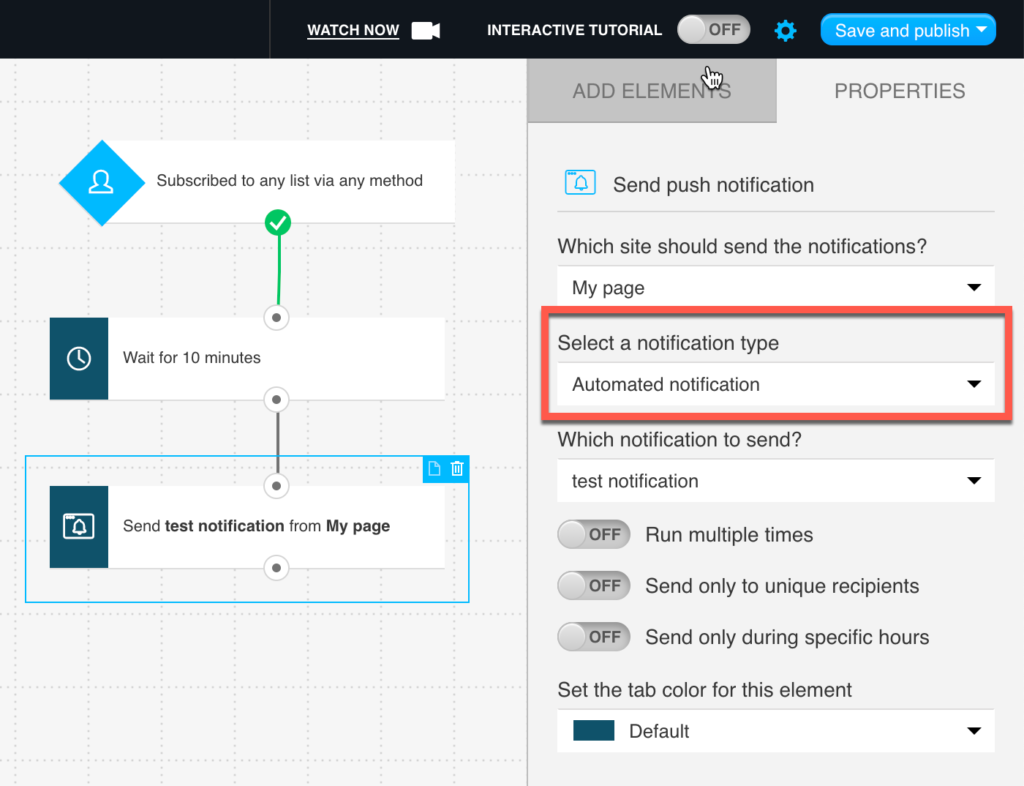
- “Select a notification type.”
You can select any type of notification (Sent or Draft), and your workflow will convert it (copy) to an Automation message type. In the process, you can re-name your automation copy of the notification to make managing content more convenient.
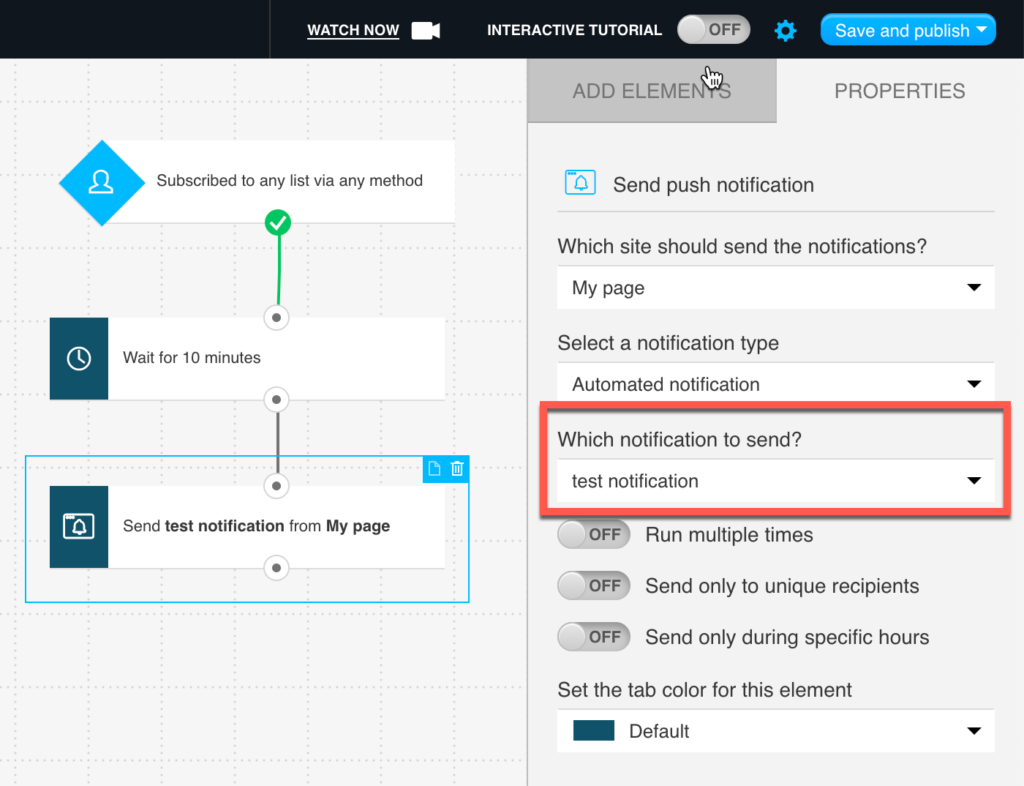
- “Which notification to send?”
You need to select a specific notification that will be shown.
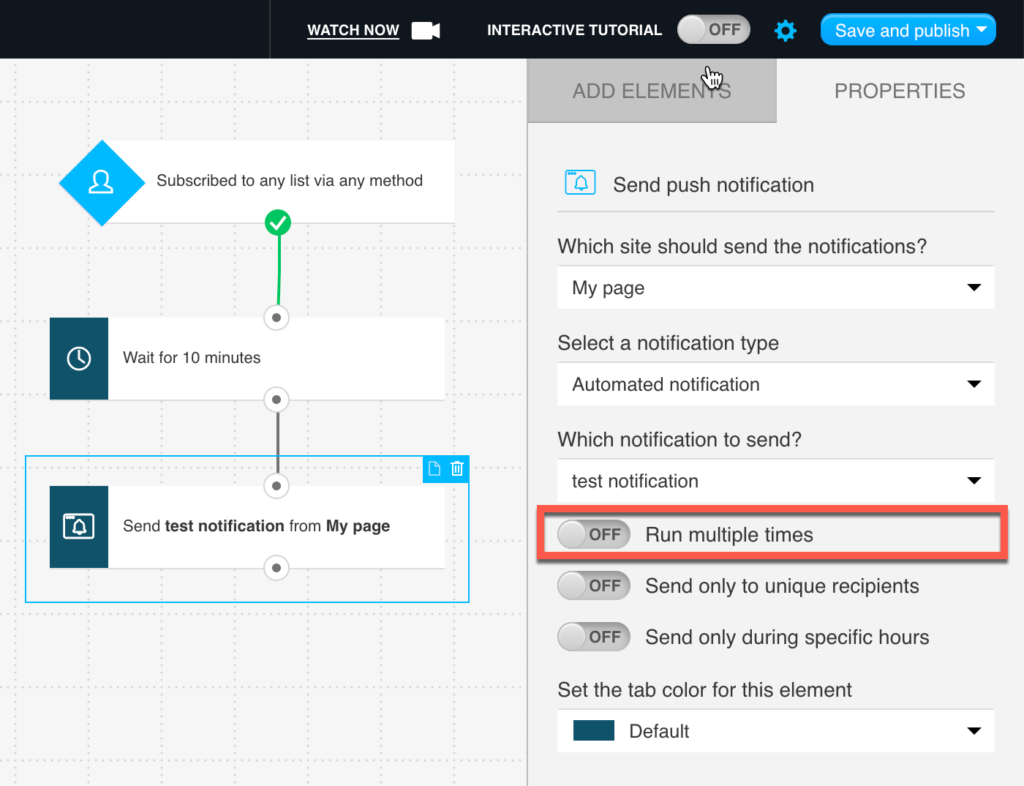
There are also 3 additional options you can use:
- “Run multiple times” – if enabled, will make it possible for a contact to go through this step more than once. You can find more details about this option here: Can I run specific actions and conditions multiple times?
- “Send only to unique recipients” – enable that option to show notifications only to unique contacts. Thanks to it, duplicated contacts won’t see the notification more than once.
If you enable that option after publishing your workflow, automation won’t check if your contact has already seen the push notification before.
You can find more details about this option here: How to send only to unique recipients.

- “Send only during specific hours” – enable this option to show your notification between specific hours. The minimal time window is 1 hour, the ending hour can’t be set up for later than the starting hour.
If a contact enters this action outside set hours, the notification will wait until the next available time window.
You can find more details about this option here: How to send only during specific hours.
Tips and tricks
- It isn’t recommended to place the ‘Send push notification’ action right after the ‘Subscribe’ condition. Please add the ‘Wait’ block between them (set to at least 5 or 10 minutes). Learn more about Wait action.
- If you import a workflow template from a different GetResponse account, all properties of the action will be reset.
- Your workflow will include only those visitors that are your subscribers. To check which visitors are your subscribers, install a tracking script on your site. That script will be responsible for collecting notification permissions, displaying notifications and identifying your list subscribers.
- You can find the code snippet for installing the script on your site is available in Web push notifications > Sites > Site installation and also in the properties of the Send push notification action inside the workflow editor.


